#header-inner img {margin: 0 auto !important;} #header-inner {text-align:center !important;}

Monday 29 December 2014

Jungle basing guide.

Hello guys and gals. Since I posted my first British Indian unit last week I have received a number of enquiries asking how I did my basing.
Well it's really quite simple, like most things I do. You simply need a few handy items which everyone will have to hand and away you go.
For this project I used the standard basing materials I would usually need like sand, PVA glue (white glue or Elmers in the US) and some paints. As this was going to be a little different from my normal basing I required a couple of different items to what I'd normally need. 
Usually I'd use static grass but this time I wanted to use something to represent leaf litter, so after raiding the kitchen cupboard I found a tub of dried mixed herbs which was perfect for the job. The only other item I needed was something to represent jungle plants. For this I used some aquarium plants picked up cheaply from a local pet store. Obviously use plastic ones and not the real ones lol. 
The pack I picked up had around 6-7 plants in it asnd that will prove  plenty, with lots of scope  for different styles and colours. 
Start by sanding and painting your base in the usual manner you would do. Here I have gone for a dark brown, highlighted with mid brown then bone. 
Once I have  allowed to paint to dry I stippled MiG pigments Vietnam Earth  dry pigment powder onto it. Tap off the excess and seal with Matt varnish and allow to dry. 
If you have never used pigments before  they are available online or from good local hobby stores. 
Make sure you use them with plenty of ventilation or whilst wearing a disk mask as the pigment dust gets in the air and can be a little unpleasant without protection
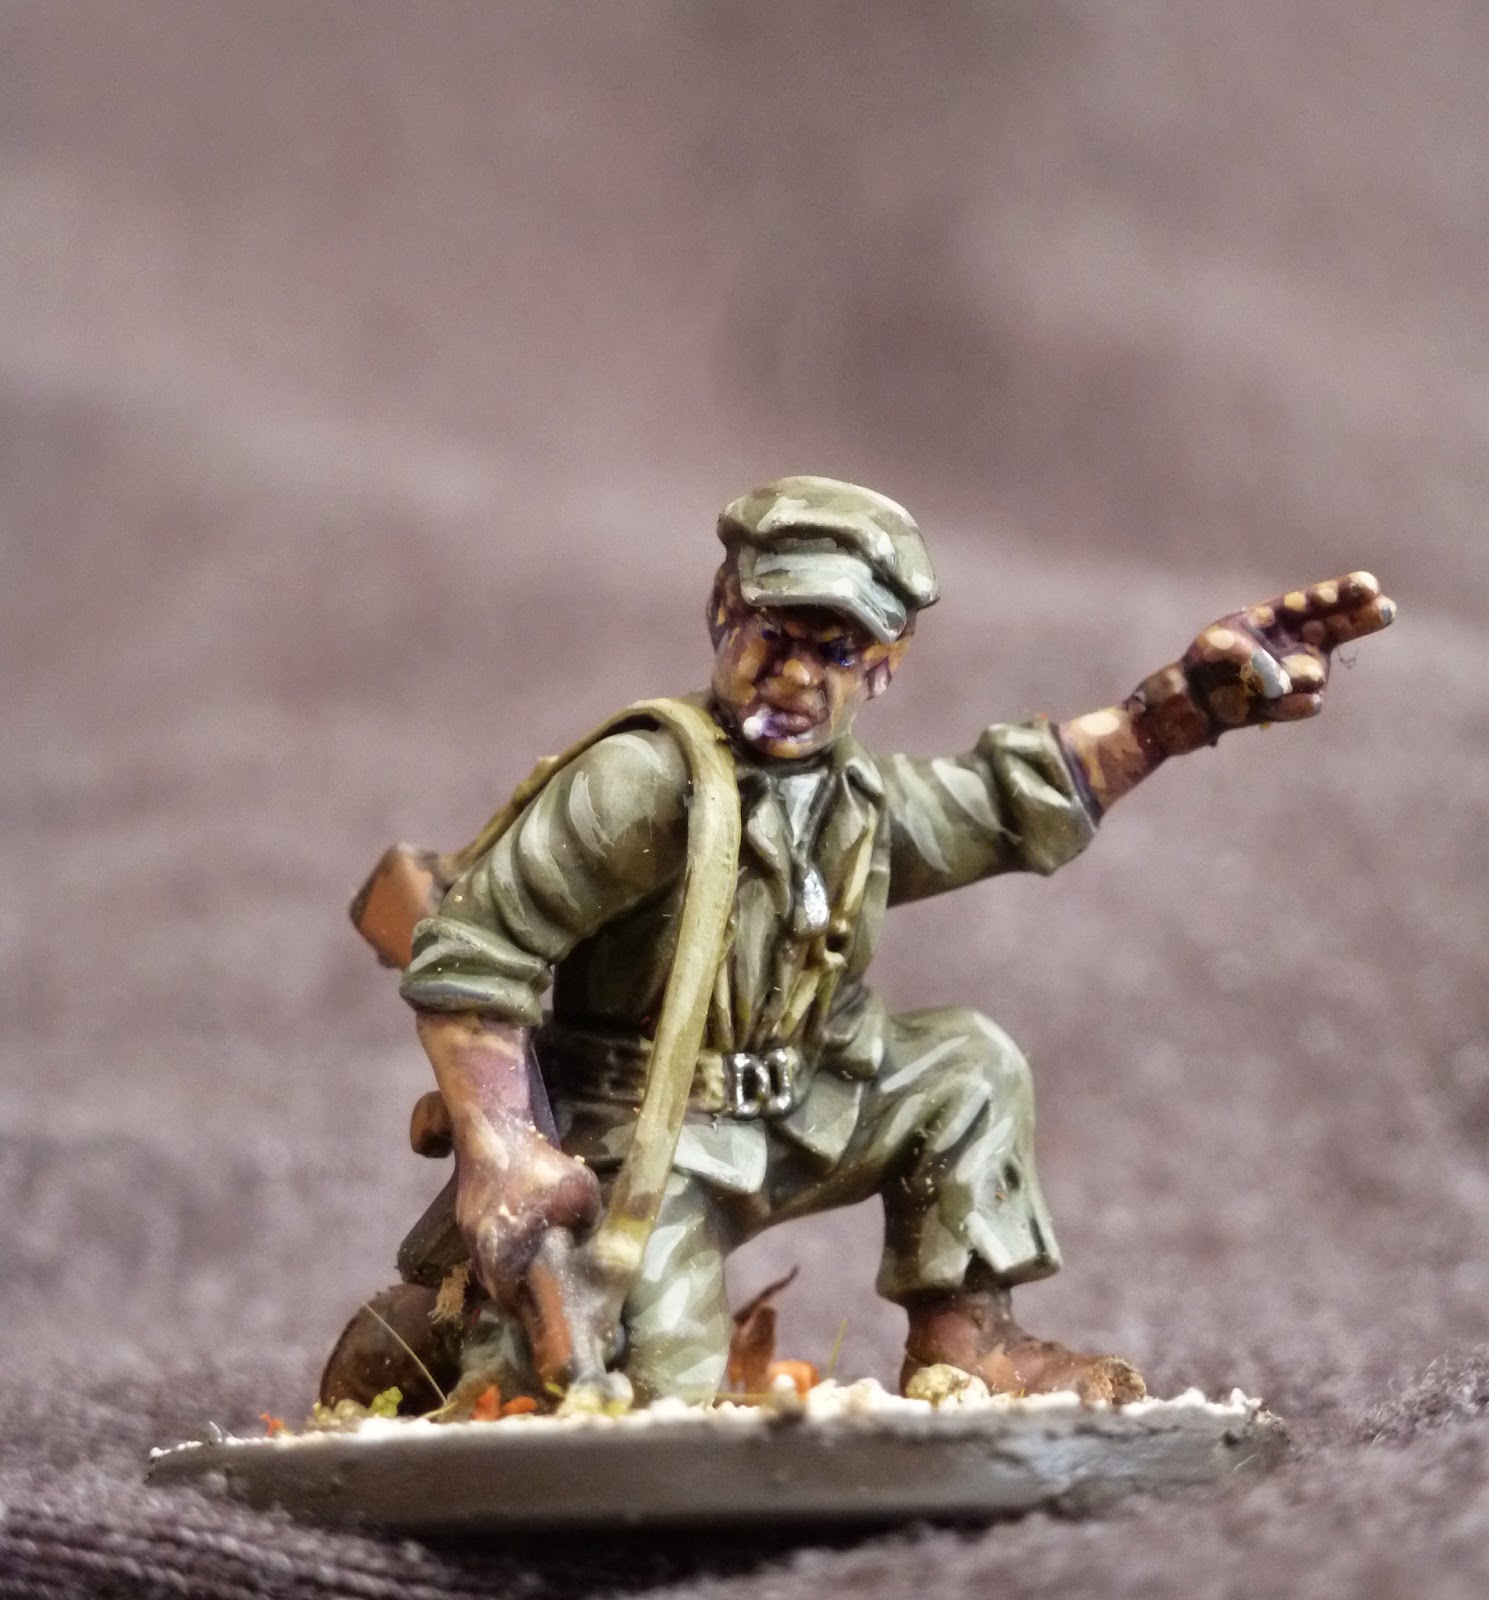
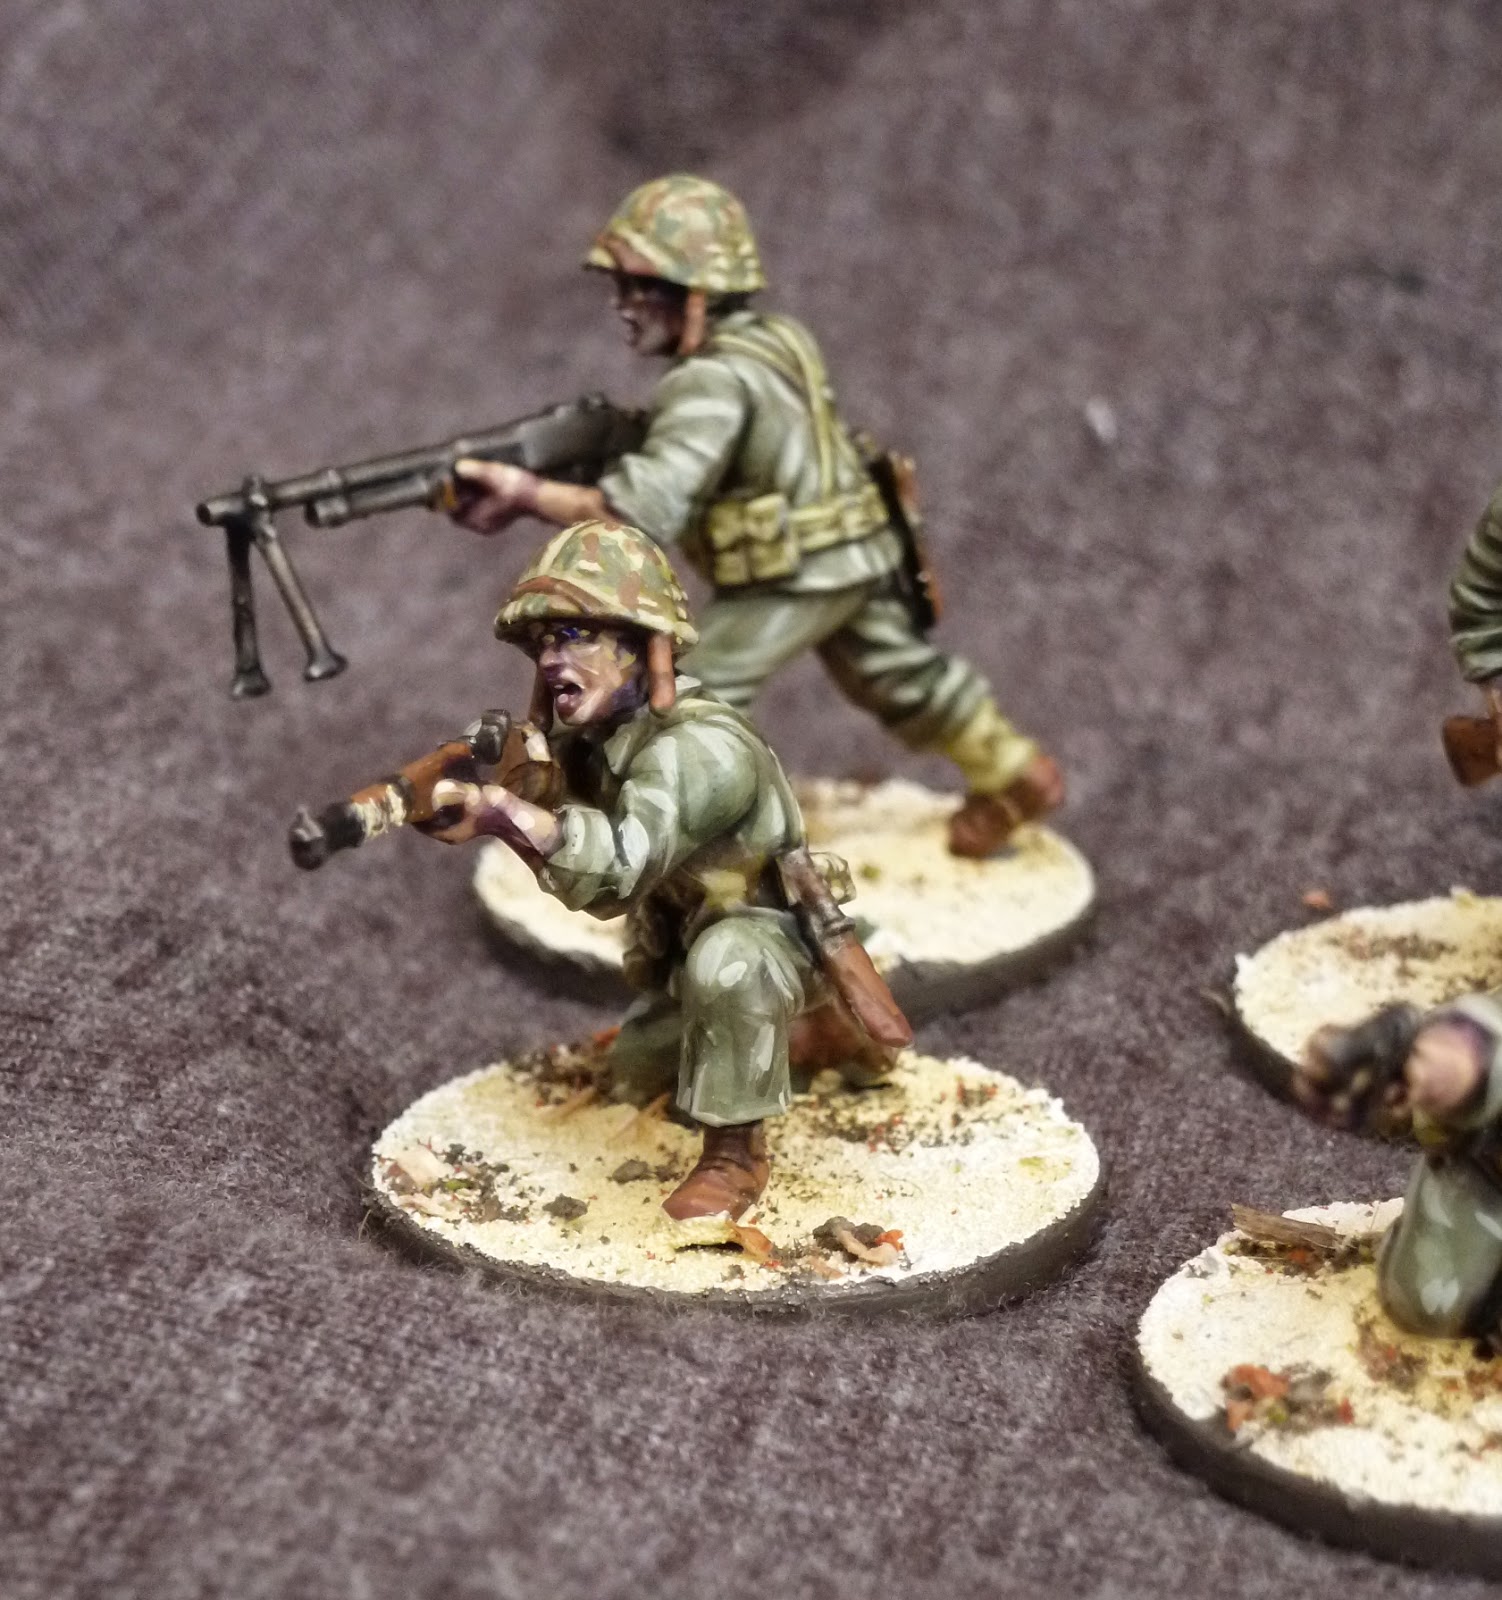
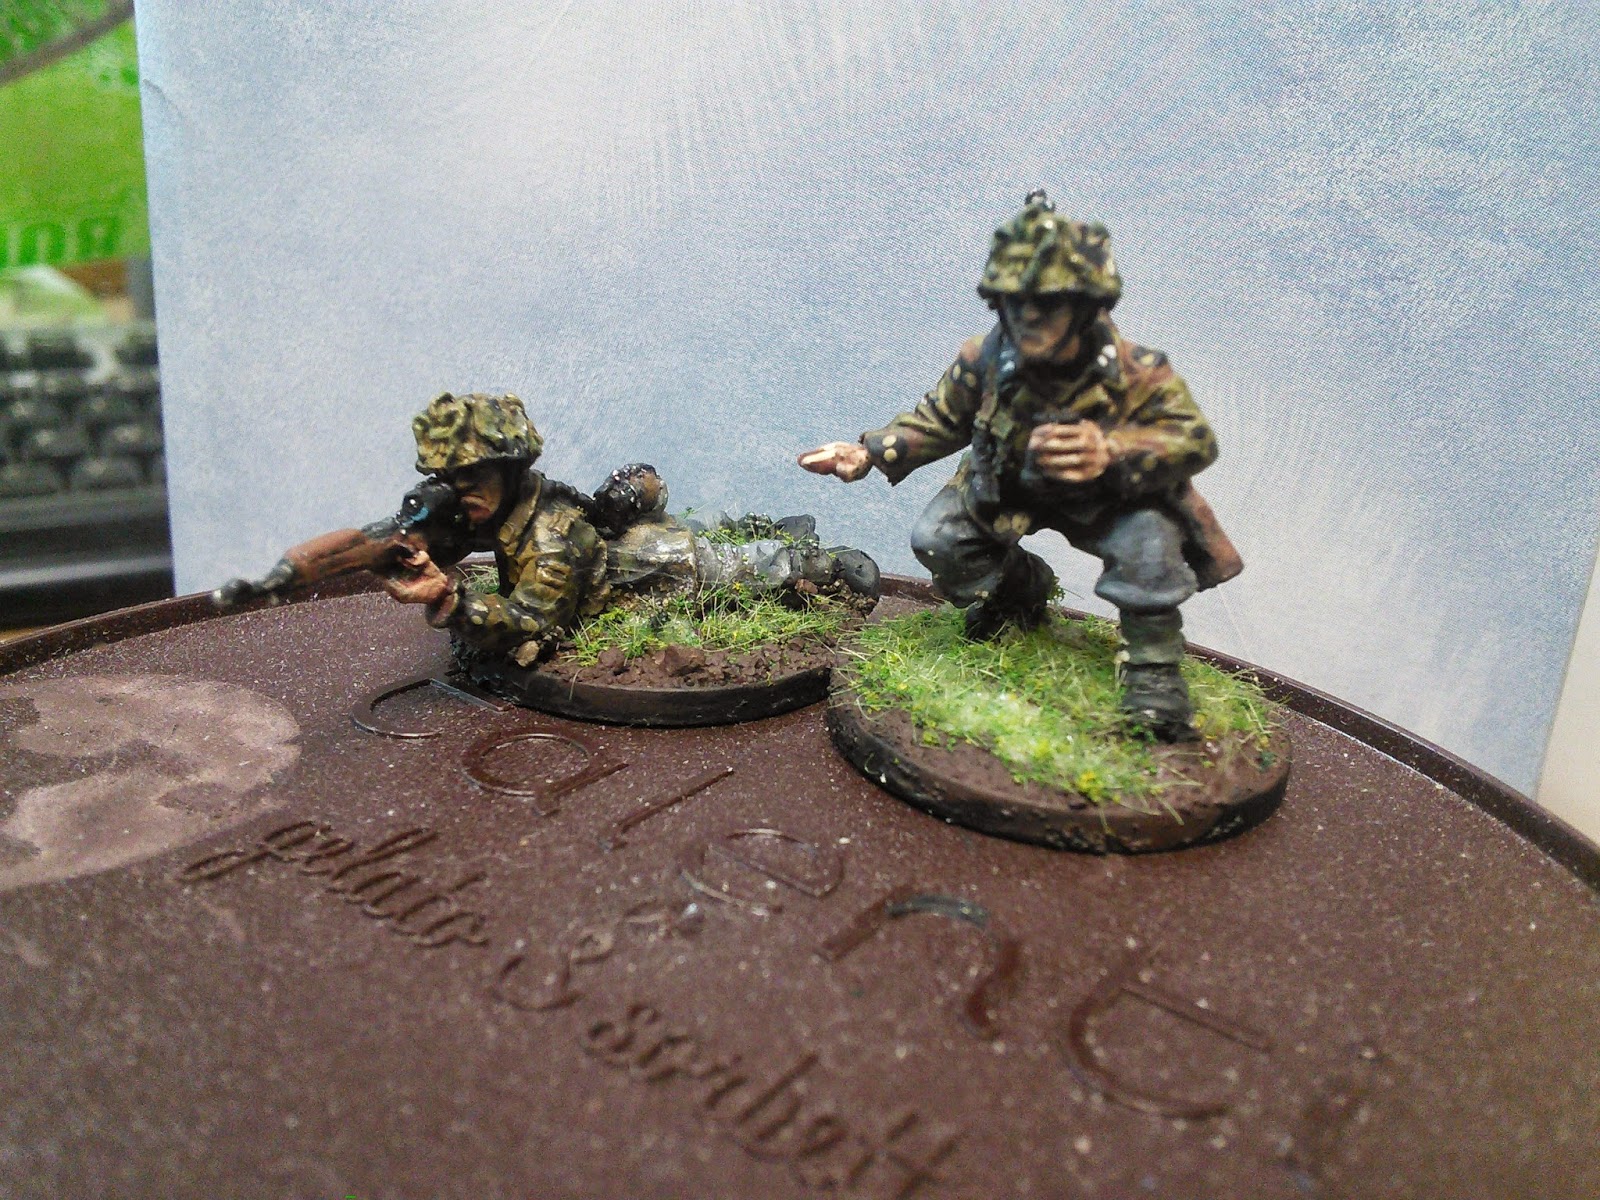
The next step is to get the plants ready for the base. I pulled one set of leaves off the plant and clipped  a couple of fronds off. I did this with two different plants to give the base some variety
I stuck the fronds to the base using superglue. To help adhere the fronds to the base I used a superglue activator. Sometimes this won't grip properly so you can drill a small hole in the base if it's plastic or wood to poke them in to or you can stick them to the base with a small blob of hot glue or you can make a little green stuff base to stick the frond into. Whatever suits you best really as it will depend on how often you will be handling the minis. 
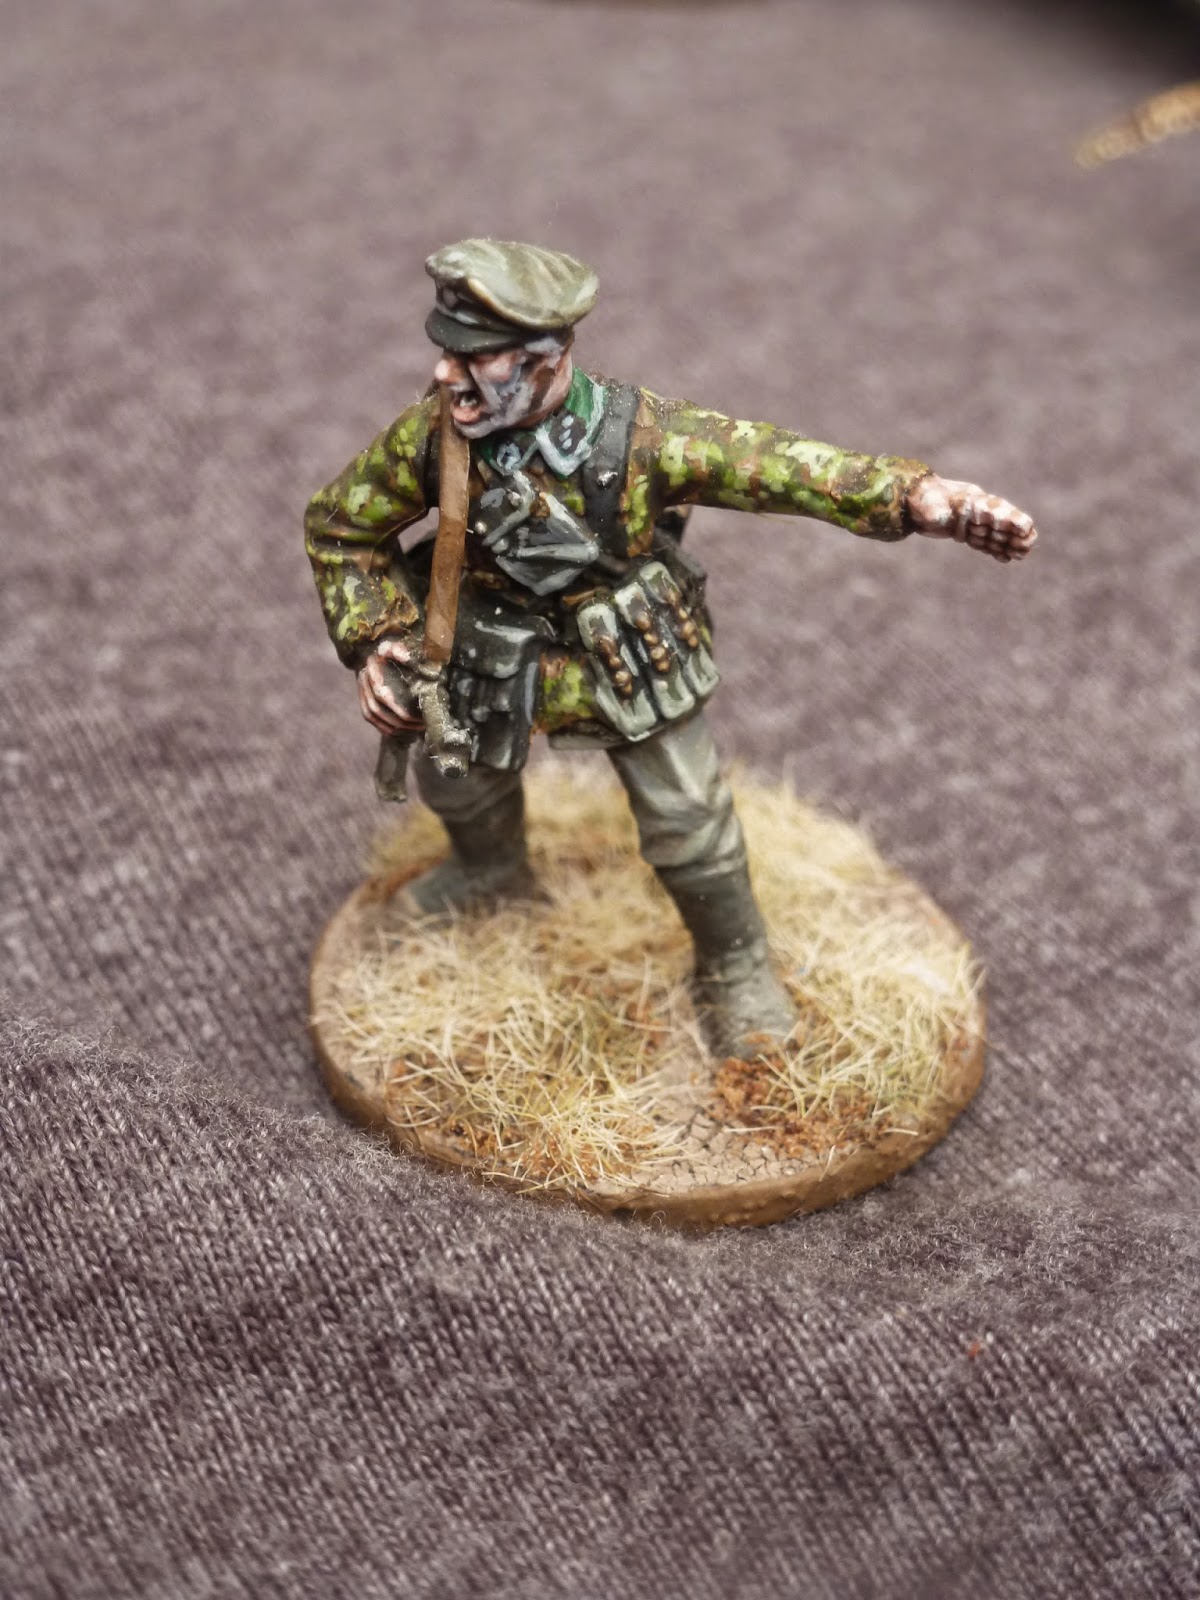
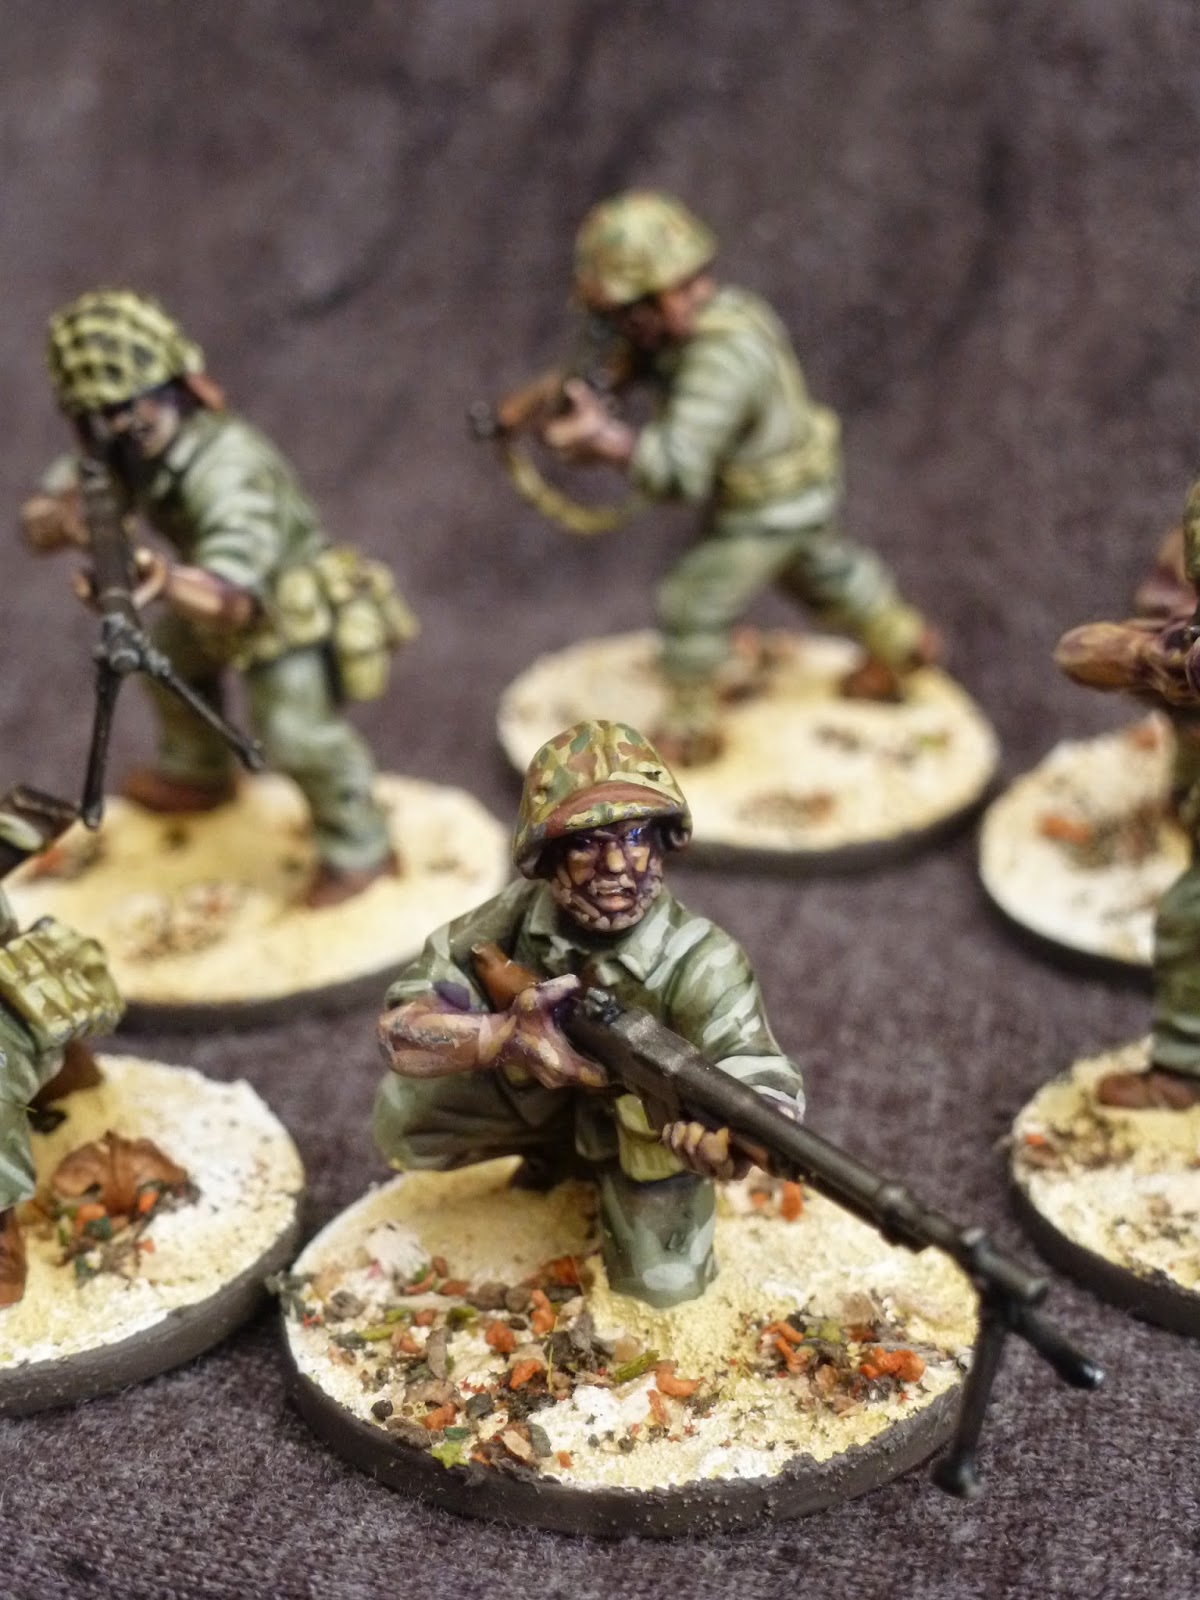
Finally I stuck the dried mixed herbs onto the base with PVA glue to represent leaf litter, and once dry seal with Matt varnish. 
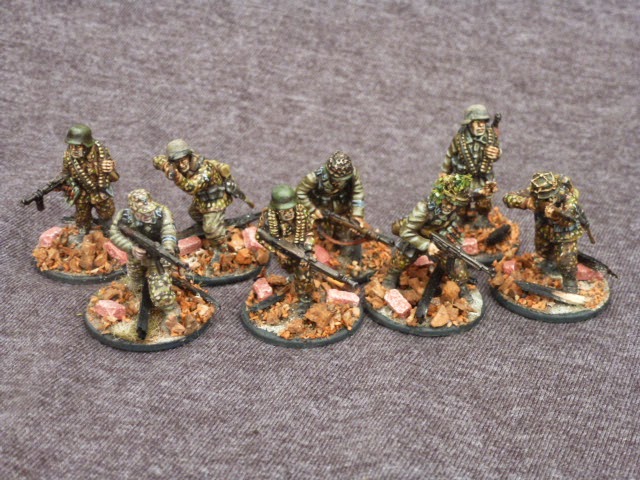
Sit back and enjoy your handy work. 
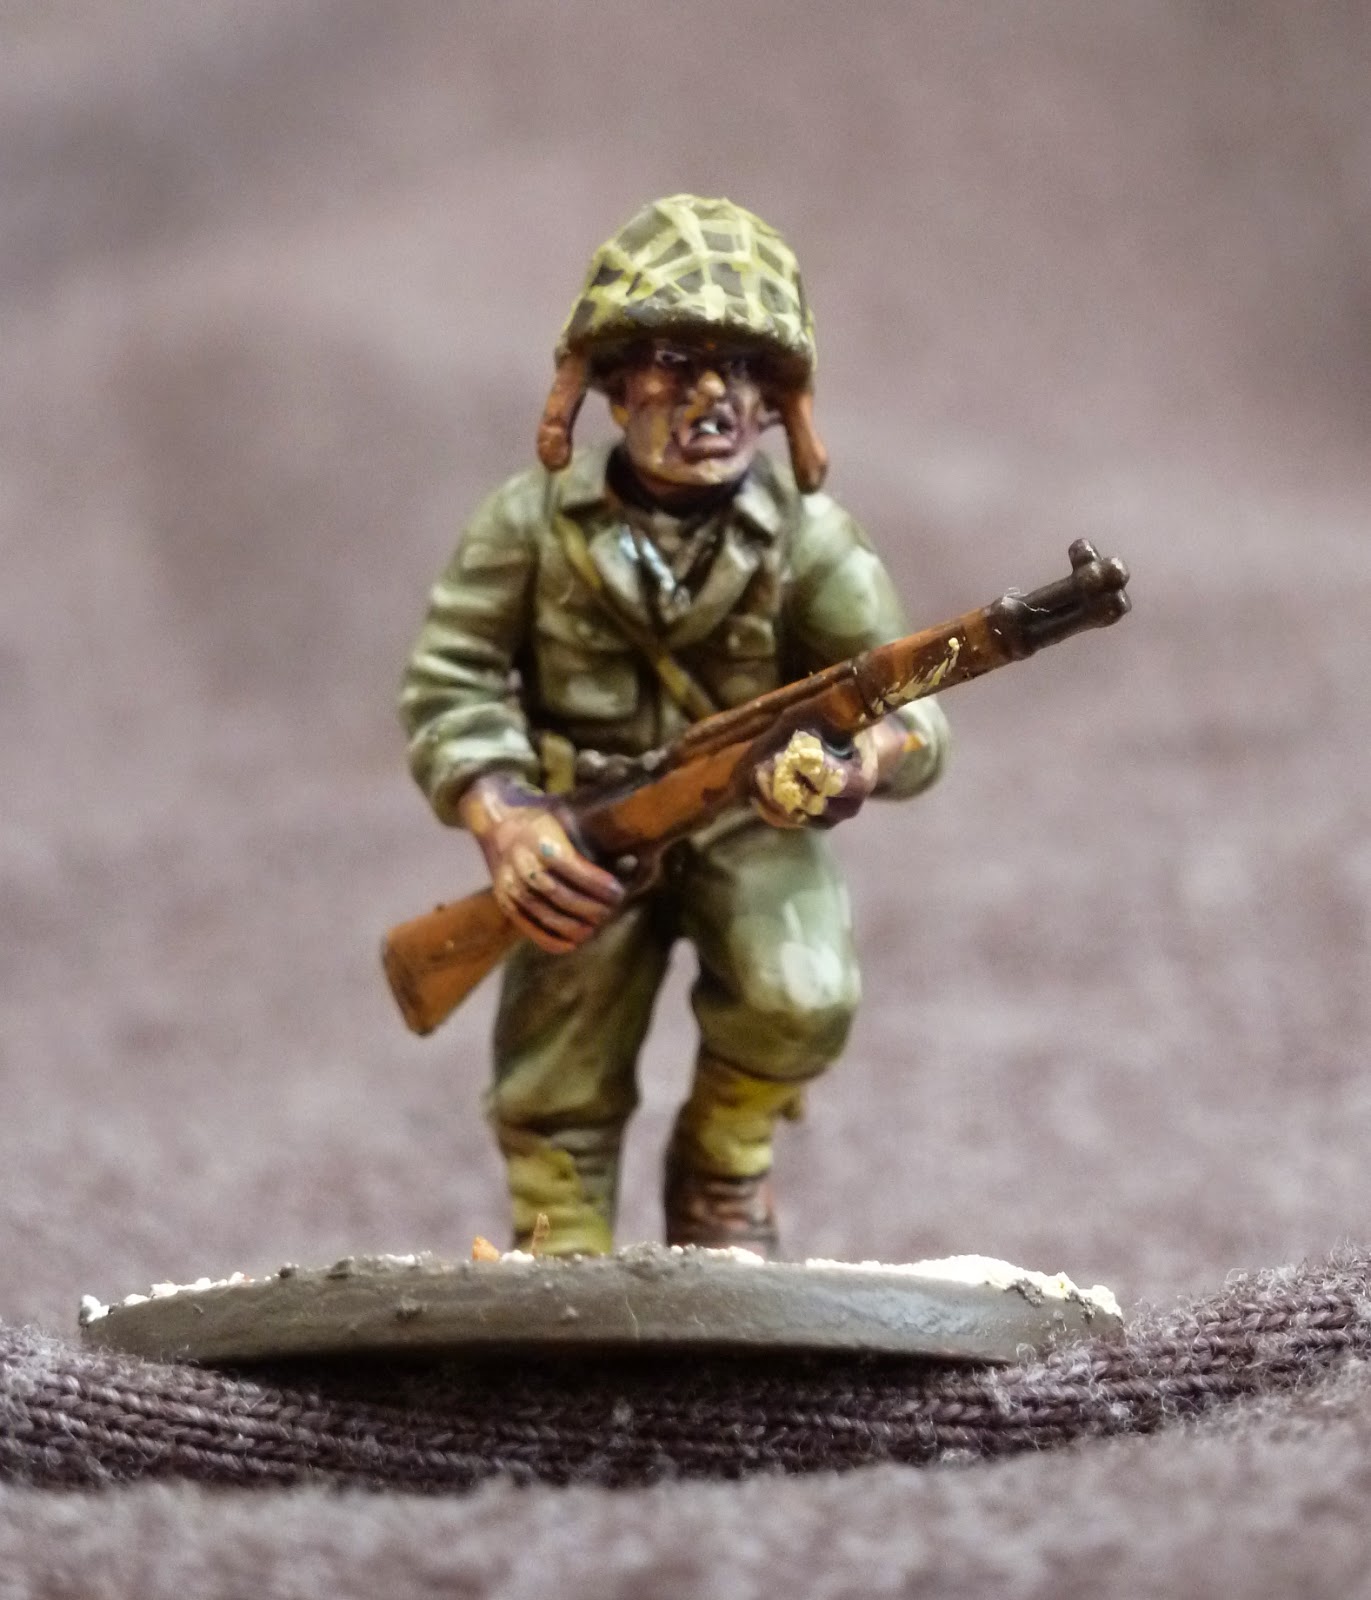
I will be posing a painting guide soon for the troops I've done too. 
Until then, enjoy :D ~Jez


Sunday 28 December 2014

Assembling plastics

Hi all, with the Christmas Holidays upon us I suspect there could be a lot of people putting together their first plastic sets for Bolt Action (And any other game for that matter). As such I thought I'd share a few thoughts I have on the subject.


  1.  Proper tools. Glue Glue Glue Glue Glue. I build probably thousands of figures over the course of a year and have learned that a pair of side cutters, a good knife and some plastic solvent glue are the most important tools around. My recommendation is this Plastic Weld. It creates a very solid join, and applying a little with an old paint brush to each bonding surface melts the plastic a little and gives you lots of play with the posing before it fully dries.Humbrol and other modelling glues are similar, but not as good as a pure solvent. If you don't have some, get some. When bonding plastic to metal you want Superglue. Superglue for plastic to plastic will cause you endless frustration and irritation. Did I mention using proper plastic glue? No? Get some. 
  2.  Proper tools. A pair of side cutters are cheap, here's an example of lots of types of Side cutters. The allow you to get the part off the sprue and without warping or bending the part in the process. When working on smaller parts like tools or pouches, I hold onto the part and clip the surrounding sprue away away along with the part still attached. This makes it far easier to trip the part without loosing it in the process.
  3. Proper tools!!!! A decent modelling scalpel is another must have. They are also cheap, and are fantastic for getting rid of mould lines and sprue connecting joints. 

There are other tools you can use, but to be honest these are the only ones I generally touch. I do have a pin vice for drilling small parts like aerials and gun barrels, and also  some wet and dry sand paper in a few different grains for particularly stubborn sanding areas, though for the purpose of building figures these aren't so important.

When putting plastic figures together don't get hung up on thinking that parts have to go specifically with a body or that two arms always always have to go together. What I tend to do, especially on sets of figures with a variety of arms is just play around and see what works aesthetically for me. It's worth using the position of the feet as a guide to getting the figure to look natural. The feet pointing one way and the arms and head pointing in different directions tends to look subtly wrong to the eye and can be somewhat dissatisfying.

It's worth assembling the model with a weapon in the hand that bears the full weight of the firearm. This allows you to set the weapon in place in a natural position, and then you can adjust the steadying arm around the rifle. That way the model retains a natural pose and you don't have to bend the weapon in to fit. If you don't want to attach the weapon before painting you can still do this, but not glue the weapon into their hands. Using the glue I suggest gives you the time to play around with the model .

Soldiers in the Second World War were trained to move either with their weapon at the port or trail positions, In the picture to the left are 3 Germans, the one on the far left is carrying his rifle at the trail, whilst the other two are carrying theirs at the port, so having your figures posed in this way can give your force a nice and subtley period look. 


When posing your firing figures try to keep them with the weapon tight to their body with the weapon tucked into their shoulders. I'm not a fan of figures running and firing simultaneously, so tend to save these for figures with their legs suitably braced or kneeling. 


The beauty of plastics is it's very easy to do conversions without having to resort to extensive work. The SS Officer here was built using a Warlord Plastic Blitzkrieg figure as a base, and then had a head taken from their late war German set. The smock was sculpted on using White Milliput. 


The loader in the Japanese LMG team was built straight from the box, with not chopping around required, I simply used one of the arms used for carrying a rifle at the trail position to make him appear to be changing magazines on the weapon.


This late war Waffen SS squad features a 3 man LMG team from Artizan Designs, and all the other figures are from Warlord Games Late War German Infantry. The NCO has had a metal head added from the Warlord range, however all the others are straight from the box.


I hope this is helpful, and provides some inspiration to building your own plastics. You can see more of my work at my painting page here at Volley Fire Painting and you can read my reviews and articles at http://volleyfirepainting.blogspot.co.uk/. Happy New Year!

Andy


Sunday 21 December 2014

                                         
Hi guys, this is the first update from myself. 

The first 500 odd points turned up in the week and has now been constructed. As you know I will be constructing, painting and gaming with a British Indian army based in Burma during the late war period. 
Two sections of Indian troops, a section of Chindits, a lieutenant, FOO, an MMG team and a sniper team. There are even a few left over troops and a Bren carrier for the next 500 points too.
I finally managed to sit down and get a section painted up just in time for today's deadline. 
First up is a section of nine Indian troops all armed with rifles. In their traditional british uniform they are resplendent in their trademark turbans of the brave Sikh troops that fought so well for the commonwealth across the globe, but in this case Burma in particular. 


The models were a joy to paint up and were certainly a big change from the German troops I usually paint. 
There are plenty of guides to painting British troops online so I won't bore you with the details here, but I will briefly mention the basing. 
After sanding, I painted then dark brown and then they were highlighted Skeleton Bone. 
Once dry I stippled a little MiG pigment Vietnam Earth on to them. I didn't want grass on the bases and after some research online I discovered that the ground covering was jungle leaf litter for the most part. I represented this with some dried mixed herbs, which had the unusual side effect of making the miniatures smell nice. 
The jungle plants are bits of aquarium plants trimmed and glued in place

So there you have it, more will be added to the force over the next few weeks, but for now, enjoy. :D

Welcome to Paris Island!


Here goes, part one of collection my US Marines. 

I decided to collect a United States Marines force following completion of my second Marine commission recently. The first I compelted in around April and consisted mostly of Warlord Games fantastic plastic figures.
I was blown away by the quality of the models and decided that I absolutely wanted some for myself.


 Sadly other projects came along and I never quite got around to them. After being invited to take part in 'A tale of bearded gamers' however the time seemed right and I rang Warlord and placed an order for some new shinies! 

Whilst waiting for my big box of treasure to arrive I planned out my US Marines Tarawa List  list so that I would have something to work towards. 


Normally when putting a force together I find a historical platoon organization and use that to build my army and fit that around the points values of my games without much thought to game performance. 

With this force I decided to do something a little more rag tag with the theme of the Battle of Tarawa as inspiration. After some research I decided to give each of my infantry squads some massive fire power through their BAR's. 

I declined to add any support weapons heavier than MMG's and 1D6 HE as it didn't seem appropriate to a landing force.

  I did go for a Sherman though after finding this awesome article on US Marine Shermans at Tarawa.

This week finished the first of my squads.    


Over the Christmas break I'll make a start on the other 2 units, with the aim to getting them done by the time of my next update. In the next piece I'll discuss what paints and techniques I use for painting USMC, and also talk about how I do my basing. 

Until then, Happy Christmas!

As always you can see more of my work here if you can't wait for the next installment. 

Andy


Sunday 14 December 2014

Humble Beginnings

Humble Beginnings


Hey Guys,

Welcome to “A Tale of Bearded Wargamers.”
Hopefully you will see this blog fill up with painted miniatures, reviews and maybe some battle reports too over the course of our hobby adventures.
Our first project that is coming soon, is a joint blog where we all paint up new 1000 point Bolt Action armies; but more on that later. Firstly we thought we should all introduce ourselves; in alphabetical order before Andy starts thinking he's the most important! Also note examples of finished paint jobs from previous projects.
Please come back over the next couple of weeks for articles introducing our new armies, plans and (hopefully) some finished minis!


Hi I'm Andy, also known as Volley Fire Andy 
from various Forums. I decided to quit a job of working with naughty people (not the fun kind either), to become a full time professional figure painter. I spend my spare time not painting off stumbling around as a historical reenactor which means I have a pretty splendid collection of references, especially when working on Germans. My own modelling focus for the last year has been to collect a couple of German armies for Bolt Action, but now it's time to branch out into something new! (Note: no beard in the image, Andy is more of a recreational beard grower when not acting soldier!)
 Andy will be completing a United States Marine force over the next couple of months, and you might have even seen his work featured in the Warlord Games News Letter! Between him and Brian, its possible that every 28mm WW2 Mini has been painted by some one on this blog!

I hardly think I need an introduction, as many of you probably know who I am from the various Facebook groups and Forums. But It's me, the one and only, Brian Ward, or as I am known to some, The Commodore. Let's see, I was asked to participate in this blog by the most wretched hive of scum and villainy. My background, let's see I started painting miniatures in 1992 as miniatures for my D&D games.Over the years I got heavily involved in WH40K where I had a really cool all scout space marine force early on in third edition, and I had a nice Eldar army at the end of my 40K days in 7th edition. Over the years, I have played all sorts of miniatures game, then one day, while searching the web I came across the game Bolt Action.I dived into the hobby head first and have not regretted looking back. I am from the great state of Wisconsin in the good old USA. I think I am the only one of the 4 of us blogging not from the UK, so don't complain if I call your Hobnobs a cookie, or my armor is lacking the u.  Brian has been a long standing member of the Admin team on the Bolt action facebook groups; and has appeared a couple of times on the popular BAR podcast. He will be completing a Waffen SS force for a friend for his first project!


Hey guys :)

I'm Jamie, some of you might remember me from the live battle reports on youtube that I filmed with a friend when Bolt Action was still a new game. I didn't win many games! Hopefully that will turn around in the course of this blog. Those who know me IRL know I suffer from a real low attention span, and rarely finish one project before moving on to the next one. Hopefully the other lads will keep me on course, and I might actually play a game with a fully painted force (leaving my opponent in shock, and therefore I might even win too!) I've played and probably painted a figure for most games out there, but I have always enjoyed painting tanks the most.
 Jamie was one of the founding members of the Bolt Action facebook group; and one of the first youtube posters covering the game.  He will be completing a 1st SS recon force for his first contributions!


PS check out my youtube channel, where I will be posting content for this tale. Here's a Sherman I painted for Warlord, what feels like ages ago!


Hi, I'm Jez. This is a quick overview of my past work and a bit about me.

I have been into the hobby gaming and painting since 1989 (wow, I feel old!) starting with Hero Quest and spending most of my painting time on GW products. I even worked for GW on a few different occasions.

Recently however I have moved away from GW and in to the world of historical gaming, playing Bolt Action and Black Powder mostly, but I still love my fantasy/sci-fi gaming including Warmachine and Hordes, Infinity, Malifaux and a host of other games.

Jez is a friendly (ish) face and long standing admin on the Bolt Action Facebook Groups, and is well known within the community as a great painter. His blog page regularly reviews new kits. He has also pushed Bolt Action in his local gaming community, creating a group of bolt action fanatics. He also demos the game with Warlord staff, and is great with rules and painting queries. He will be completing a joint Sikh and Chindit force operating in the far east.


So there you have it guys, we hope you enjoy!
- A Tale of Bearded Wargamers